Sunday, 29 May 2016

Pencil Case

Since I need to travel soon, I thought I would like to take a traveller’s notebook with me as well as a pencil case to carry what I need. The only 'portable' pencil case I have is a small leather cylinder that used to belong to my husband. It is beautiful and has a nice patina from having been used for so many years.

Still, a cylinder is not so easy to pack, I found, and so I started to look for a flat pencil case. As I always seem to do, I visited Morgan LeFae's Trinkets shop (link on the left) and I found just what I was looking for. OK, I have to admit, I did have that case in my mind for a long time and now was the right time to get it...

I am used to the thick leather that Monique uses for the traveller's notebooks and this one was, of course, thinner for flexibility but it was still of exquisite quality. The colour I chose was dark chocolate (yummy!) and it matches so well my original traveller's notebook that I also got from Monique. It is absolutely stunning and so convenient: it can be opened completely and tied to one of the elastic bands of the traveller's notebook for better portability.

I cannot wait to start travelling and take the pencil case for a 'test drive'!


Thursday, 12 May 2016

Transformation - Part 3

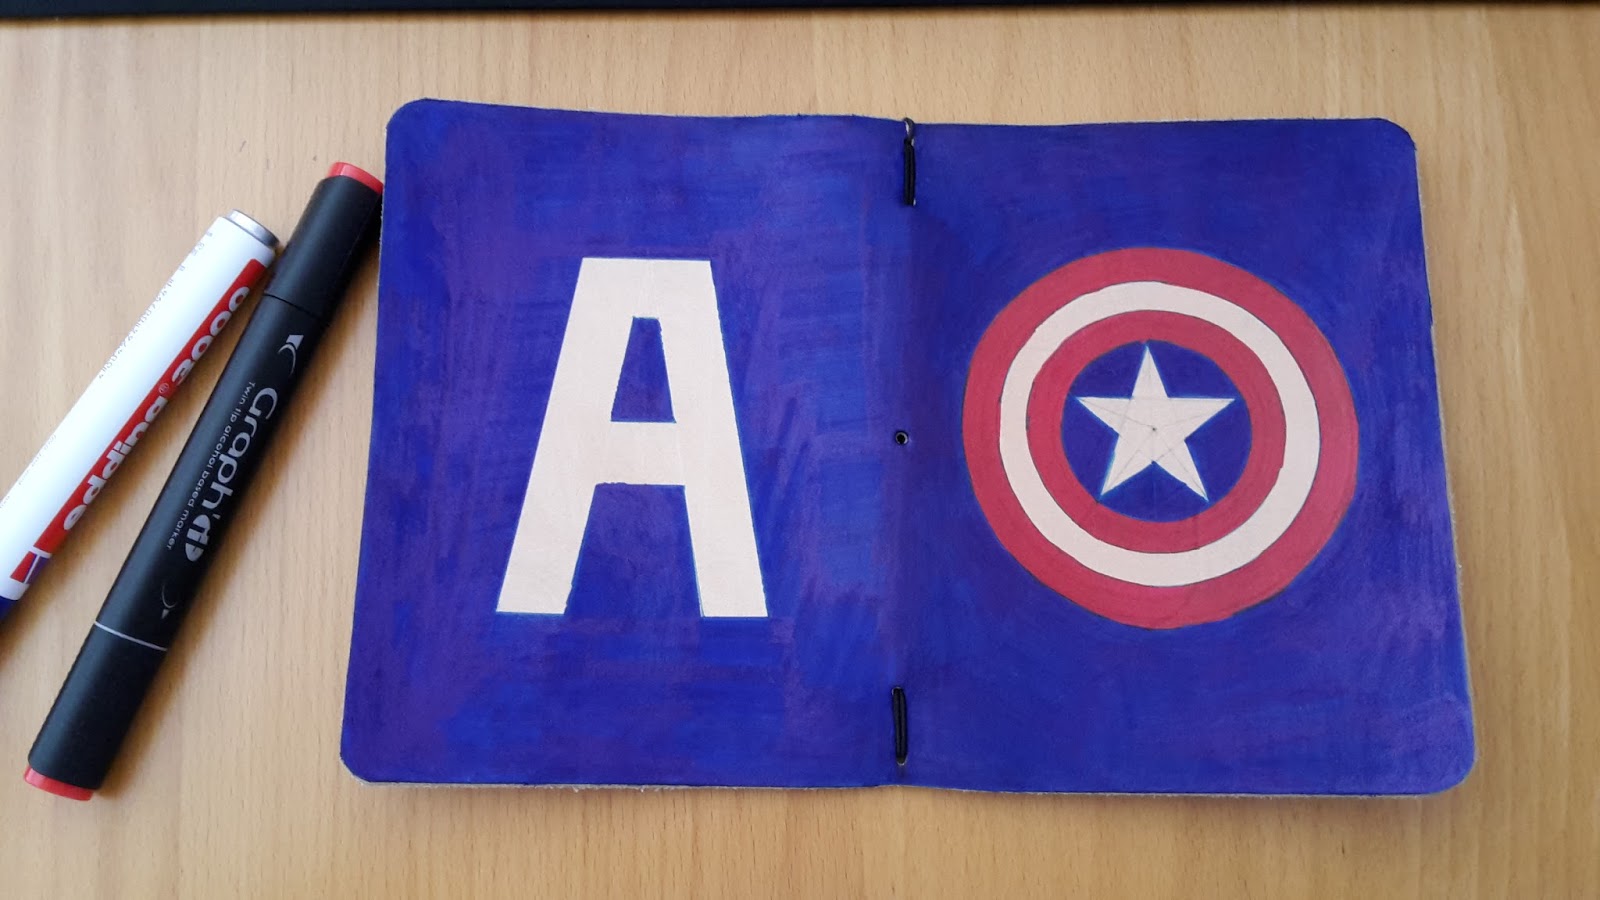
After I let the final layer of marker dry, the end result looked pretty good so I decided to leave it at that. I smoothed in some olive oil and let it dry overnight. Then I got some colourless shoe cream and I applied it on the leather. I have to say that even though I was really disappointed at first, I am loving the end result! It's a bit rough around the edges but I think it's perfect!

Here's a multitude of pictures to show how gorgeous it has turned out:


And here it is now together with Lil' Wade:


 Right now, I'm using the Captain America TN with my Hobonichi and Lil' Wade has 2 notebooks that I use for random note taking and project prepping. I'm thinking about maybe swapping notebooks and covers.

One last thing I would like to add if I find what I'm looking for would be red elastic band for closure and for holding the inserts. Now how cool would that be?

Tuesday, 10 May 2016

Transformation - Part 2

After the TN dried and after getting what I needed to continue, I finally got started. I made a vector drawing of what I wanted to do on Inkscape and when I was done there, I worked on it further with Gimp in order to get the right size for printing.

This is when I realised that my printer wouldn't work... I wanted to print a stencil but it just wouldn't let me.

So because my design is mainly concentric circles, I decided to go old school and unearthed my very basic and limited geometry drawing skills and drew the sketch directly on the cover. Of course, the pencil I was using didn't mark the leather all that well and I had to tweak some of my tools... I got out a Frixion pen, did a test to make sure I could delete the marks afterwards (I could) and got started.

Once I was done with the initial sketch, I took out my alcohol-based markers. I know this is not the traditional tool to use when applying colour on leather, but I had some great results on the bookmark I did with a Deadpool design so I thought I would give it another go on a bigger project.

I started colouring the main sketch (concentric circles) and it looked good. Then I coloured the background completely with a blue Edding marker. And this didn't look good at all... I was really disappointed although I did expect it might do something like that. I had colouring marks everywhere... This is definitely one of my pet peeves when using markers, despite the fact that I love working with them...

I waited a while for the original colouring to dry and I went through it again with my marker and to my surprise, the marks were less pronounced the second time around!

I have to say though that the marker I used for the design is different from the marker I used for the background. For the design, I used a red marker from the brand Graph'It.


I already have 2 shades of grey of the same brand and I love them. Unfortunately, I cannot find them in shops in Germany so whenever I go to France, I make sure to get a few markers before leaving! They are really good and almost half the price of the Copic pens. I don't know how they compare with Copic pens in terms of quality but I really like the Graph'It ones.

The marker I used for the background is a blue Edding pen that is available pretty much everywhere and it feels maybe a bit less 'juicy' than the Graph'It pen but it is still very good.


This morning, I went over the cover a third time and the marks are still there, although less pronounced than after the second go.

One thing I noticed, which should be obvious, is that the cover feels more rigid or at least drier than it did before I started this project. But this is hardly surprising since the alcohol contained in the pens will have contributed to the drying of the leather.

And here is the finished (for now!) product:


I will wait a little while before moving ahead. I'm still not sure whether it needs one more layer of markers or whether I can just leave it as it is and add some product to soften the leather. I could also give it a vintage feel as well and it would take the emphasis away from the marks. Decisions, decisions...

Monday, 9 May 2016

Transformation - Part 1

I have introduced my natural untreated leather cover a while ago. This was the very first cover I ever did and it is clearly my pride and joy. This is the cover that houses my Hobonichi Techo (A6) and it's a cover I use every day.

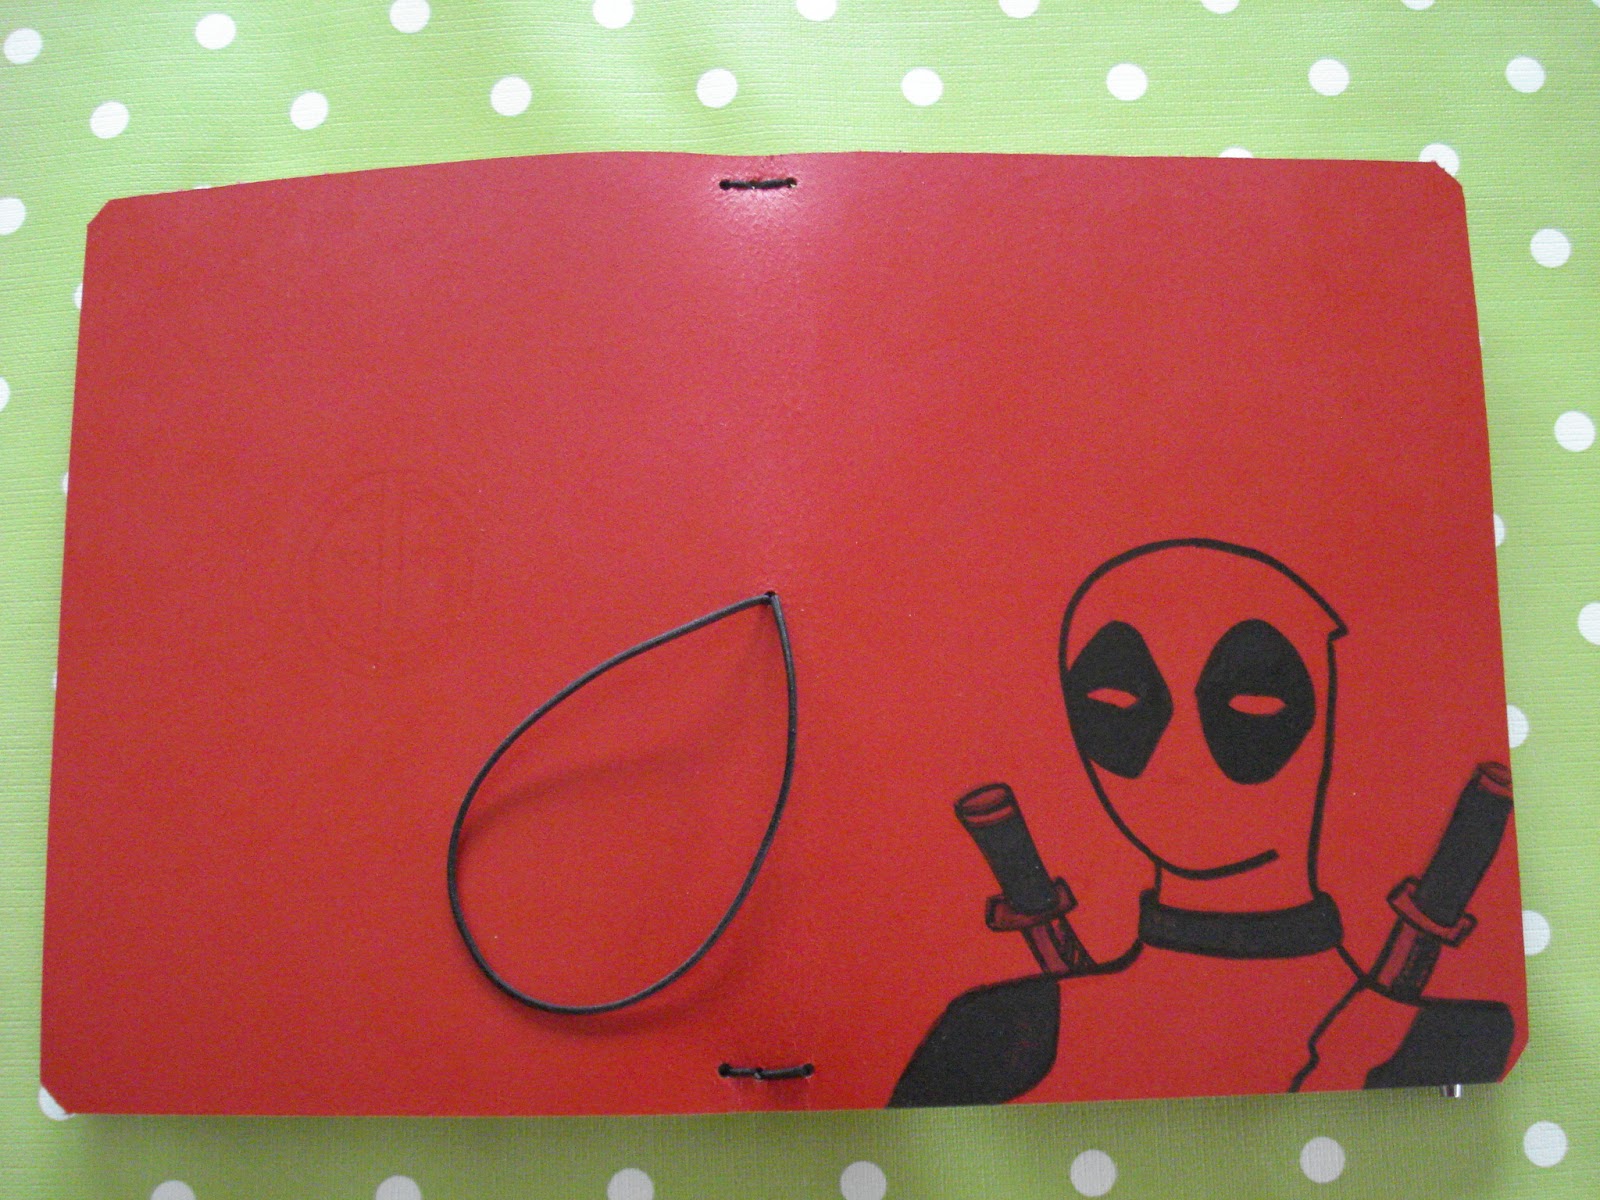
A few months ago, I also made a bright red A6 and LMC sized cover with a Deadpool design on it. I documented this largely in this post and this one.

I have temporarily removed my Hobonichi and placed it in the Deadpool A6 cover while I work on the plain leather one.


Before I start drawing on it, I need to prepare the leather, which means I need to give it a bit of a clean because over the weeks, it has developed some marks and I need to have those removed.


I have removed the closing elastic band and I have wiped the cover clean with a damp cloth. I have seen different instructions recommending to use mild soap and then some form of conditioner but all I want really is to remove the main black marks and freshen it up a little.

This is now done, so I will have to wait until it fully dries. In the meantime, I'm going to start working on the actual design and I will be gathering my supplies.

Saturday, 30 April 2016

Doodles on Caturday

I have taken out my sketchbook and I have started doing a few cat doodles in preparation for a very exciting project. For now, it's casting time and trying to find the right cat...

Wednesday, 20 April 2016

BOOK REVIEW: Apparition Lake by Dan D. Lamoreux and Doug Lamoreux

*WARNING: POSSIBLE SPOILERS AHEAD!*

A few months ago, I was sent the novel Apparition Lake by authors Daniel D Lamoreux and Doug Lamoreux. The book was published by Creativia.


When I saw the title, I didn't really know what to expect but I was hoping for a tale of mystery and supernatural. I was not disappointed at all! Both mystery and supernatural were present in this story.

I devoured the book! I seriously could not put it down. I loved Glenn Merril and Two Ravens. Even though both men come from very different backgrounds they form the kind of friendship and bond one aims to find with another person. I also liked J.D. who reminded me a bit of Dana Scully from the X-Files: a strong female scientist but I didn't warm up as much as I did with the other two men.

As much as I loved the main characters, I have to say that I positively hated Stubby and was glad to see what became of him. I think I hated him even more than the poachers! One thing that surprised me was that their characters were not as fleshed out as the 'good guys' but it didn't spoil anything at all.

When I reached the end of the book, I thought long and hard about the main message of the book: mistreating the environment can have very serious consequences, and not just supernatural onces.

The descriptions really made me want to add Yellowstone to the bucket list of places I want to visit and it also made me want to leave my office more often to go and explore the nature around me.

Rating: 5*/5

Tuesday, 19 April 2016

Broadening My Horizons

When I created this blog, I had in mind to just share pictures of the drawings and paintings I did, just so that it would be easier for me to show people who might be interested to see what I can do and have everything gathered in one place. It started as a very bird centric blog and then I expanded it to people once I completed the 29 Faces Challenge.

At this point, I decided that a change of name and image was in order. I'm not incredibly gifted when it comes to web designing (although back in the 90's I was able to make a really kitschy website with lots of flashing icons in my sleep). These times have changed and I now rely heavily on whatever tools Blogger has at hand to make this electronically suitable for this day and age.

The changes were made and then I started adding links to my favourite pages and shops. I have 'met' all of these people and I have formed some good relationships with them. Make sure to check them out on the left hand column.

The first person I added was Ray Hendrix from R.M. Noble Designs who does professional logos for companies, clubs, t-shirts. He even designed the logo for my translation company and I am forever grateful for that. He managed to capture what I was about while still maintaining a strong professional appearance.

The second link is for Morgan LeFae's Trinkets. Monique is the maker of stunning traveller’s notebooks. The trend started with the company Midori that was making some minimalistic leather covers that could house several notebooks at once. Monique took the style further and now creates true works of art. Check out her shop and web page on the left hand side to have an idea of what her creations look like and how versatile they are.

The last link (for now) is of a publishing company called Creativia. They have released some really great novels in many genres on Amazon, many of which have gone on to become best sellers. It's definitely worth the detour to discover some new favourite authors (my favourite novel so far is Apparition Lake by Doug and Daniel D. Lamoreux).

I have therefore decided to not only publish my latest artworks but to also share book reviews and talk about my ever-lasting love of traveller's notebooks. So expect to see a lot of variation in the next few posts!

Friday, 15 April 2016

Harley Quinn

I have been a long time fan of Batman comics and I was introduced to them by my husband who is a avid fan of the masked hero. I really loved the contrast between the different Robins and Batman himself as they are such opposites. While I liked all the good guys, I didn't really have a favourite bad guy (although I did like Bane because he was so impossibly muscular). As much as I appreciated Batman's arch enemy, the Joker, it was really when I got to watch the movies and the animated series that I really got to appreciate him and Harley Quinn.

I absolutely loved how Bruce Timm drew her and I loved the energy that she had in the animated series. Now that the Suicide Squad movie is almost upon us, I have watched the trailers and I loved Margot Robbie's interpretation of Harley. She gives her a different feel to Harley from the ones I had already seen and felt when reading the books and watched the animated series. Even the way she looks is really different and reflects these differences.

A friend of mine posted the following meme, which pushed me over the edge and made me draw myself as Harley Quinn (there is nothing more empowering than this!)


Sunday, 6 March 2016

Zootopia

Today we went to the cinema to watch Zootopia. It was a great movie and I loved the fox in it. I just had to draw him. The ears are bigger because I wanted to give it a fenec fox feel. It's also a quick drawing so I just used some felt tip pens for quick results.

Monday, 29 February 2016

#29faces Challenge: The Last Leg of the Journey!

Even though I haven't posted for the last few days and updated on my progress with the challenge, I have continued to draw and paint my daily faces and I am very pleased to say that I have completed the challenge. It has been a challenge particularly for me since faces are not my forte. I have seen myself grow in confidence and be inspired as time progressed and I am very proud of what I have achieved.

Along the way, I have met extremely talented artists and I have seen mind blowing works of art. I am truly humbled to have been a part of this vibrant community and will definitely miss it.

Without further ado, here are the last faces of the challenge:

Day 23:


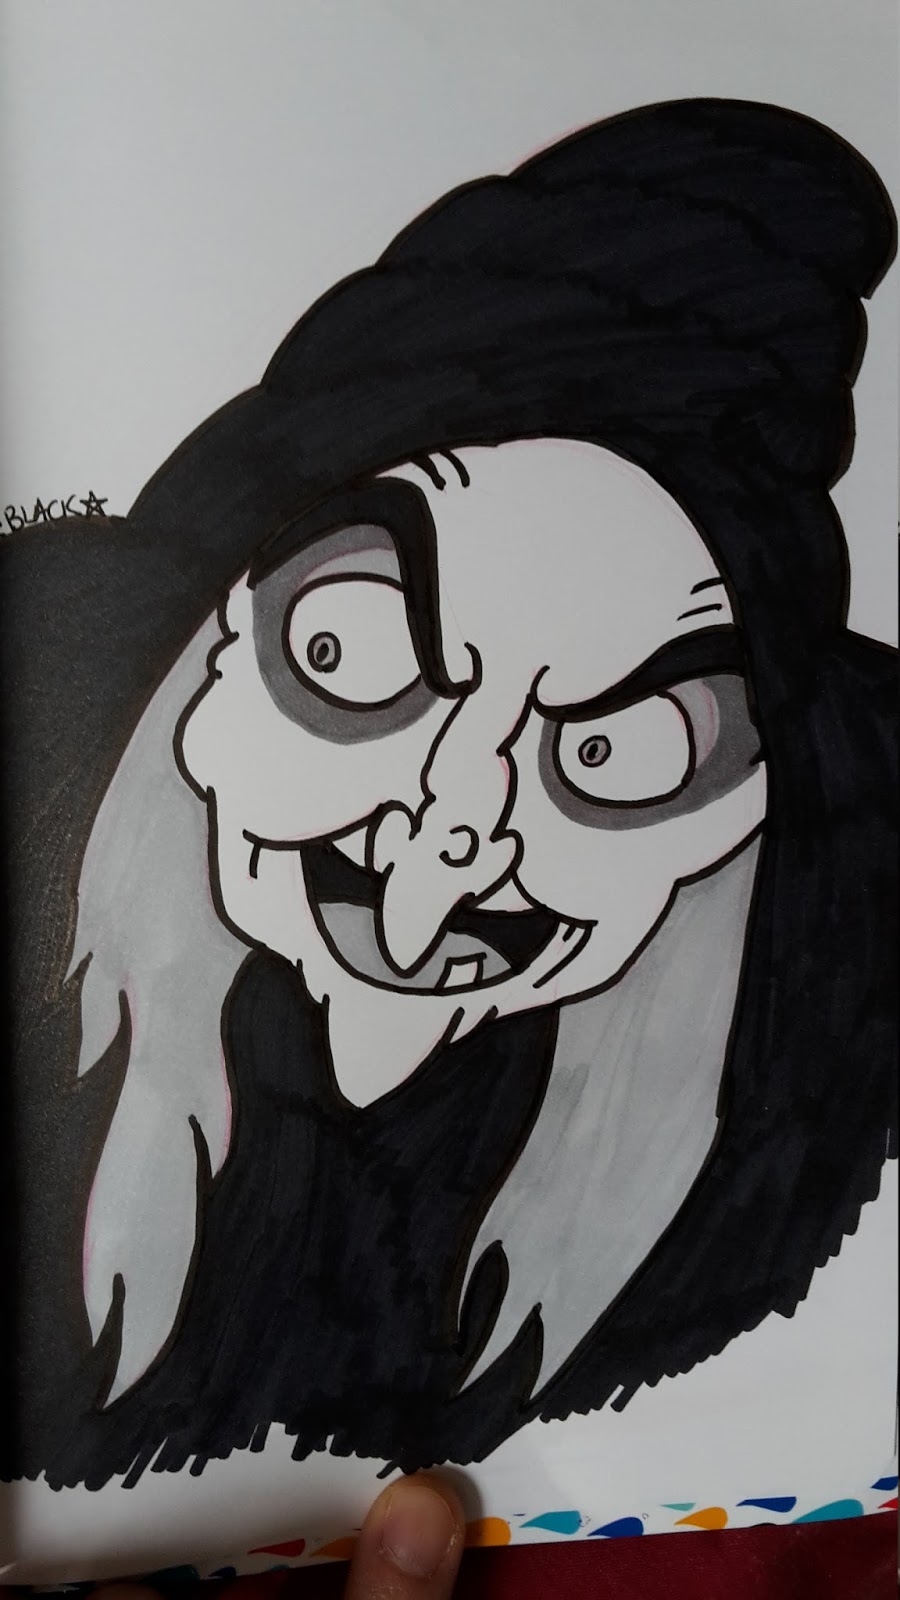
I went back to the Evil Queen. This is one of my favourite characters from the Disney movies. It was really interesting drawing an older lady as the features are so much more complex than those of a younger lady.

Day 24:


Calvin from Calvin and Hobbes. After drawing the complex Evil Queen, I needed to draw someone cute for a change!

Day 25:

 After watching Brave with my daughter, I just HAD to draw Merida. She is definitely one of my favourite Disney Princess. I just love how unconventional she is and how free she is. However, I felt too chicken to tackle that glorious hair of hers and I was too afraid not to do it justice so I picked a picture of her with her hair imprisoned in her headdress.

Day 26:


I had just finished to do this sketch and was not really planning on colouring it but after posting it on the group page, I decided that I hadn't done it justice so I went back and coloured it. I have to say that I'm particularly proud of the skin colour I used, especially for the cheeks. Mixing colours in watercolour is something I'm just starting to do. Because I'm too lazy to go to town and get some flesh coloured pans, I tried to use what I had in hand, and make some flesh colour of my own... This is one of the rare cases where laziness paid!

Day 27:

Back to a quick and easy sketch of Leela from Futurama. Nice and easy with bold colours (and my very own brand of purple that I mixed all on my own!)

Day 28:


This is one character I have been meaning to draw for a long time. It's Arale from the manga Dr Slump.

Day 29:


This is a completely new and original creation. I wanted to do something big for the last day and I hesitated between winging it or picking some very elaborate sketch and in the end, I winged it. One of my favourite artists is Tim Burton. I love how eternally startled his characters always are. The lines are often simple but always effective. I more or less inspired myself from someone I knew a long time ago and I put a spin on him. I am desperate to practice nebulae and this was the perfect occasion for it. It was a bit tricky staying within my lines but I did it. And I had to add a raven because I'm all about ravens. Somehow, I feel that the background should not be white and I might change it at some point. This is by far the biggest portrait I did (A3!).

So this is it for this challenge!

Monday, 22 February 2016

Friday, 19 February 2016

Days 18 and 19: #29faces challenge

Here are my offerings for days 18 and 19 of the #29faces challenge:

Spontaneous fountain pen drawing

Gimp and Inkscape collaboration

The Deadpool Traveler's Notebook Project - Part 2

LMC TN - Almost finished!

Little leather charm I made for the LMC TN

A6 TN that will be called Lil Wade (front)

A6 TN that will be called Lil Wade (back)

One on top of the other


From top to bottom: Lil Wade, natural leather A6 TN, Big Wade, Original Morgan LeFae's Trinkets LMC

All filled with notebooks

This was quite a journey and I learned a lot on leather and how to use it. I doubt I have learned everything there is to learn about it but it's still a very good start:

- Already treated leather is REALLY hard to work on and modify, ever after filing it...
- Markers seem to suddenly die when they are used on treated leather...
- I can use kitchen scissors to cut leather circles!
- A 50 Cent coin is the right size to make a charm.
- China ink is a good replacement for markers although many layers are needed.

I wanted to wait for a while before I completed the red LMC TN (Big Wade) because I originally wanted to do a lot of sketching inside the cover but because it was so time consuming and more or less pointless to do this on a treated surface, I have given up on the idea. One thing that I wouldn't mind trying is spray paint. I would create a stencil and then spray some paint all over. Ideally, if I'm skilled enough and if the spray paint sticks to the leather, I would love to do something like this across the front and back cover of Big Wade:


That would look pretty amazing!

However, if I do that, I will have to wait for the summer to do that so that I can do this outdoors. So watch this space as there may be more to come at a later date!

Thursday, 18 February 2016

The Deadpool Traveler's Notebook Project - Part 1

Before going to see the Deadpool movie and since discovering that you can actually use markers on leather, I had been thinking about making myself a traveller's notebook (TN for short) in red with some Deadpool illustrations. I wanted to do one in large Moleskine size (LMC) and so I started to take some measurements. I already have one TN in LMC size from Morgan LeFae'sTrinkets and I really love how the size is so portable and still big enough to doodle, paint and write. When I measured my TN it was slightly bigger than A4 size by half a centimetre. The difference was too big to just wing it with an A4 piece of leather and I definitely needed something bigger. So I looked for the next size, which is A3 and once I did some calculations, I figured out I could definitely pull off an LMC TN as well as an A6 one!

I went to all the textile and furniture shops that I could find in my town and the general answer I got was that it was difficult to find the thickness of leather I needed for my project.

So I turned to eBay and found what I was looking for.

I ordered my leather and when it arrived, I noticed that the 'inside' of the leather was not suede, like I usually see on other pieces of leather and discovered later that the top side was also treated and polished.

My project isn't finished yet but I wanted to post a few pictures of what it's looking like so far.

Back side of the piece of leather. Completely waxed!

Right side, looking really bright!

The 2 A6's

After the drawing

Both the A6 (top) and the LMC (bottom)
I guess I should have known that the top side was waxed but the penny didn't drop until I started drawing on it and that the marker started to go all funny and stopped working all together. I finished the drawing with some China ink and this morning it's looking slightly sticky. I would love to do a little Deadpool logo in the back of the leather and maybe also write Deadpool above the main drawing but first, I'm going to have to test on the leftover bits of leather.

I'm planning on cleaning the leather with some acetone and then using a file to make it a bit rough. I wonder how it's going to look once I finish to use the file... I hope the paint is not going to leave the drawing. But if it gives it an edgy style, I might try it on the LMC...

Watch this space for more updates!